Measuring Guide · Indoor Roller Shades

How to measure for your roller shade

Reading time: 8 minutes

Every window is different, which is why we make our roller shades to fit the exact space you want to cover.

This guide shows you what to measure, in what order, and how to get to the number you enter in the configurator, so your shade installs without surprises.

GETTING READY

What do you need?

You only need a few tools. Have ready:

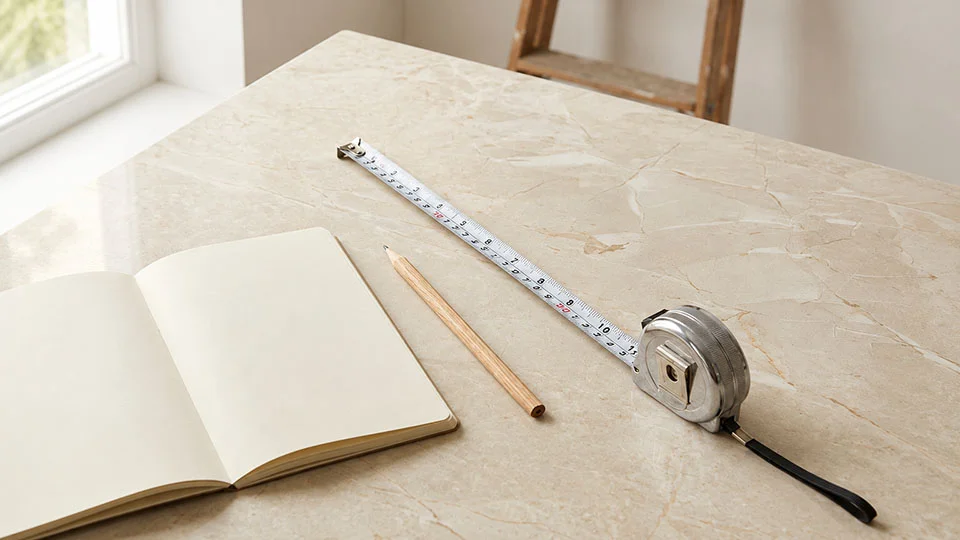
  • a rigid tape measure, ideally metal;
  • a pencil and paper to write down the measurements;
  • a ladder or step stool, if the window is high.

Each shade is made to measure, within these limits:

  • Overall width, side brackets included: from 23 5/8" to 110 1/4"
  • Height, bottom bar included: from 11 3/4" to 118 1/8"

STEP 1

Check for obstacles

If something gets in the way of the fabric as it lowers, switching from wall mount to ceiling mount usually solves it.

Before you measure, make sure the fabric can lower without touching anything. Pay particular attention to:

Window sill projecting into the room

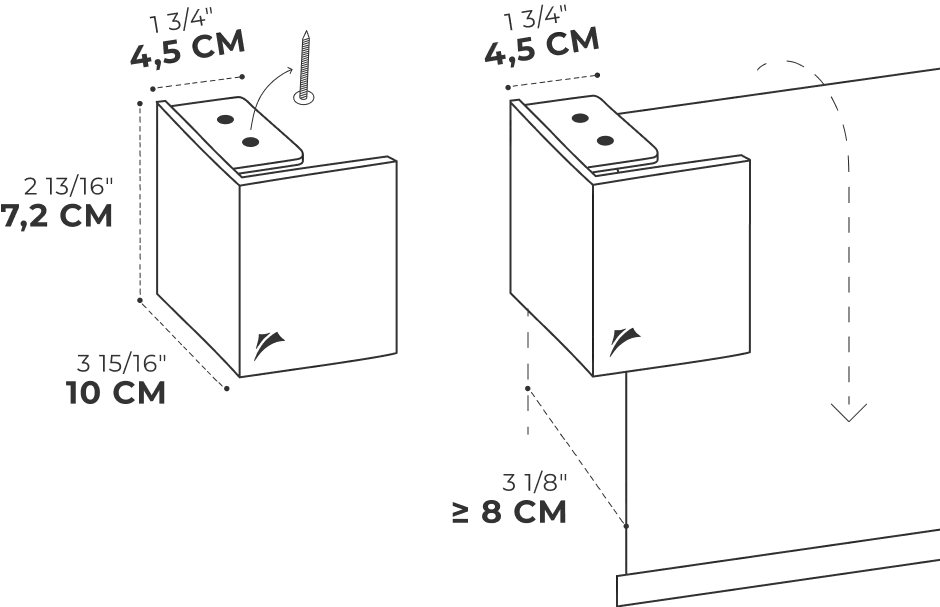
With a wall mount, if the sill projects more than 3 1/8" from the wall, the fabric hits it on the way down, before it reaches the bottom.
Choose a ceiling mount and fix the side bracket far enough from the wall to clear the sill.

Projecting handle

If the handle projects more than 3 1/8" from the wall, the fabric hits it on the way down.
Measure how far it projects. If it's more than 3 1/8", choose a ceiling mount and fix the side bracket farther from the window.

Tilt-and-turn or hopper window

When tilted open, the sash leans into the room and can hit the side brackets or the fabric.
Open the window in this position and measure how far the sash projects from the wall. If it's more than 3 1/8", choose a ceiling mount and fix the side bracket farther from the window.

Radiator under the window

If the radiator projects more than 3 1/8" from the wall, the fabric rests on it.
Measure how far it projects. If it's more than 3 1/8", choose a ceiling mount and fix the side bracket farther from the wall, or give us the measurements for a shorter shade that stops above the radiator.

Air vent

If there's an air vent near the window, the lowered shade must not cover it. In many rooms, for example those with gas appliances, the vent is there for safety.
Check where the vent is in relation to the fabric. Choose the width, height or mounting type so it stays clear.

Existing window treatments or systems

Rods, tracks, valance boxes and old shade brackets can take up the space for the side brackets or get in the way of the fabric as it lowers.
Measure how much space they take up. If you want to keep them, choose a mounting point that leaves room for both systems.

Other items near the window

Air conditioners, wall lights, shelves or furniture can take up the space for the side brackets or stop the fabric before it reaches the bottom.
Check that the mounting point and the fabric's whole path are clear, and that the shade won't block the air conditioner's airflow. If the item can't be moved, change the mounting point or the width.

Allow space to open the window

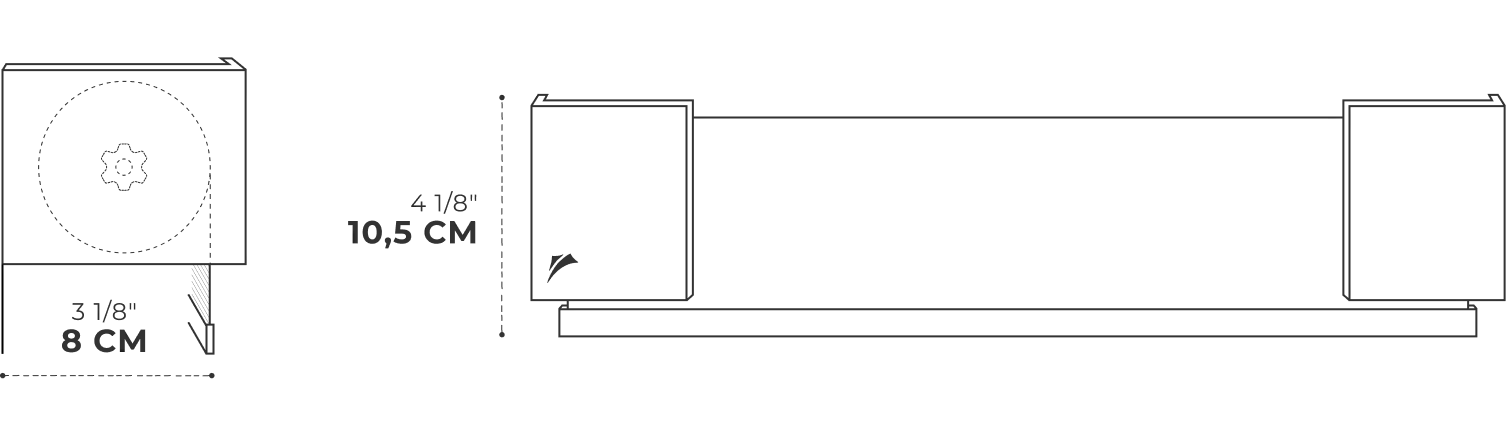
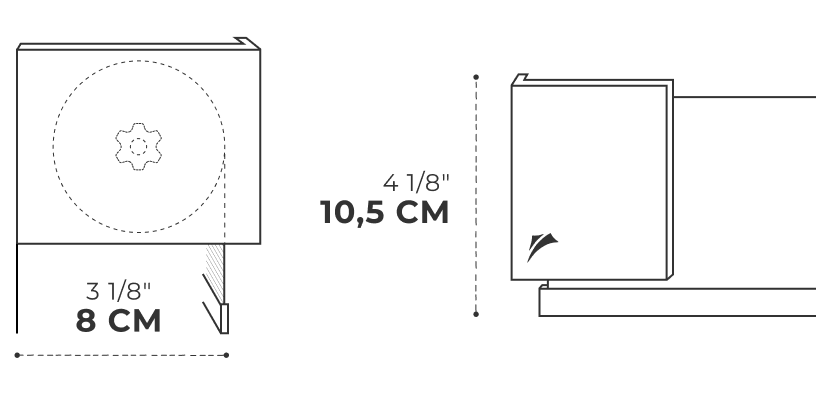
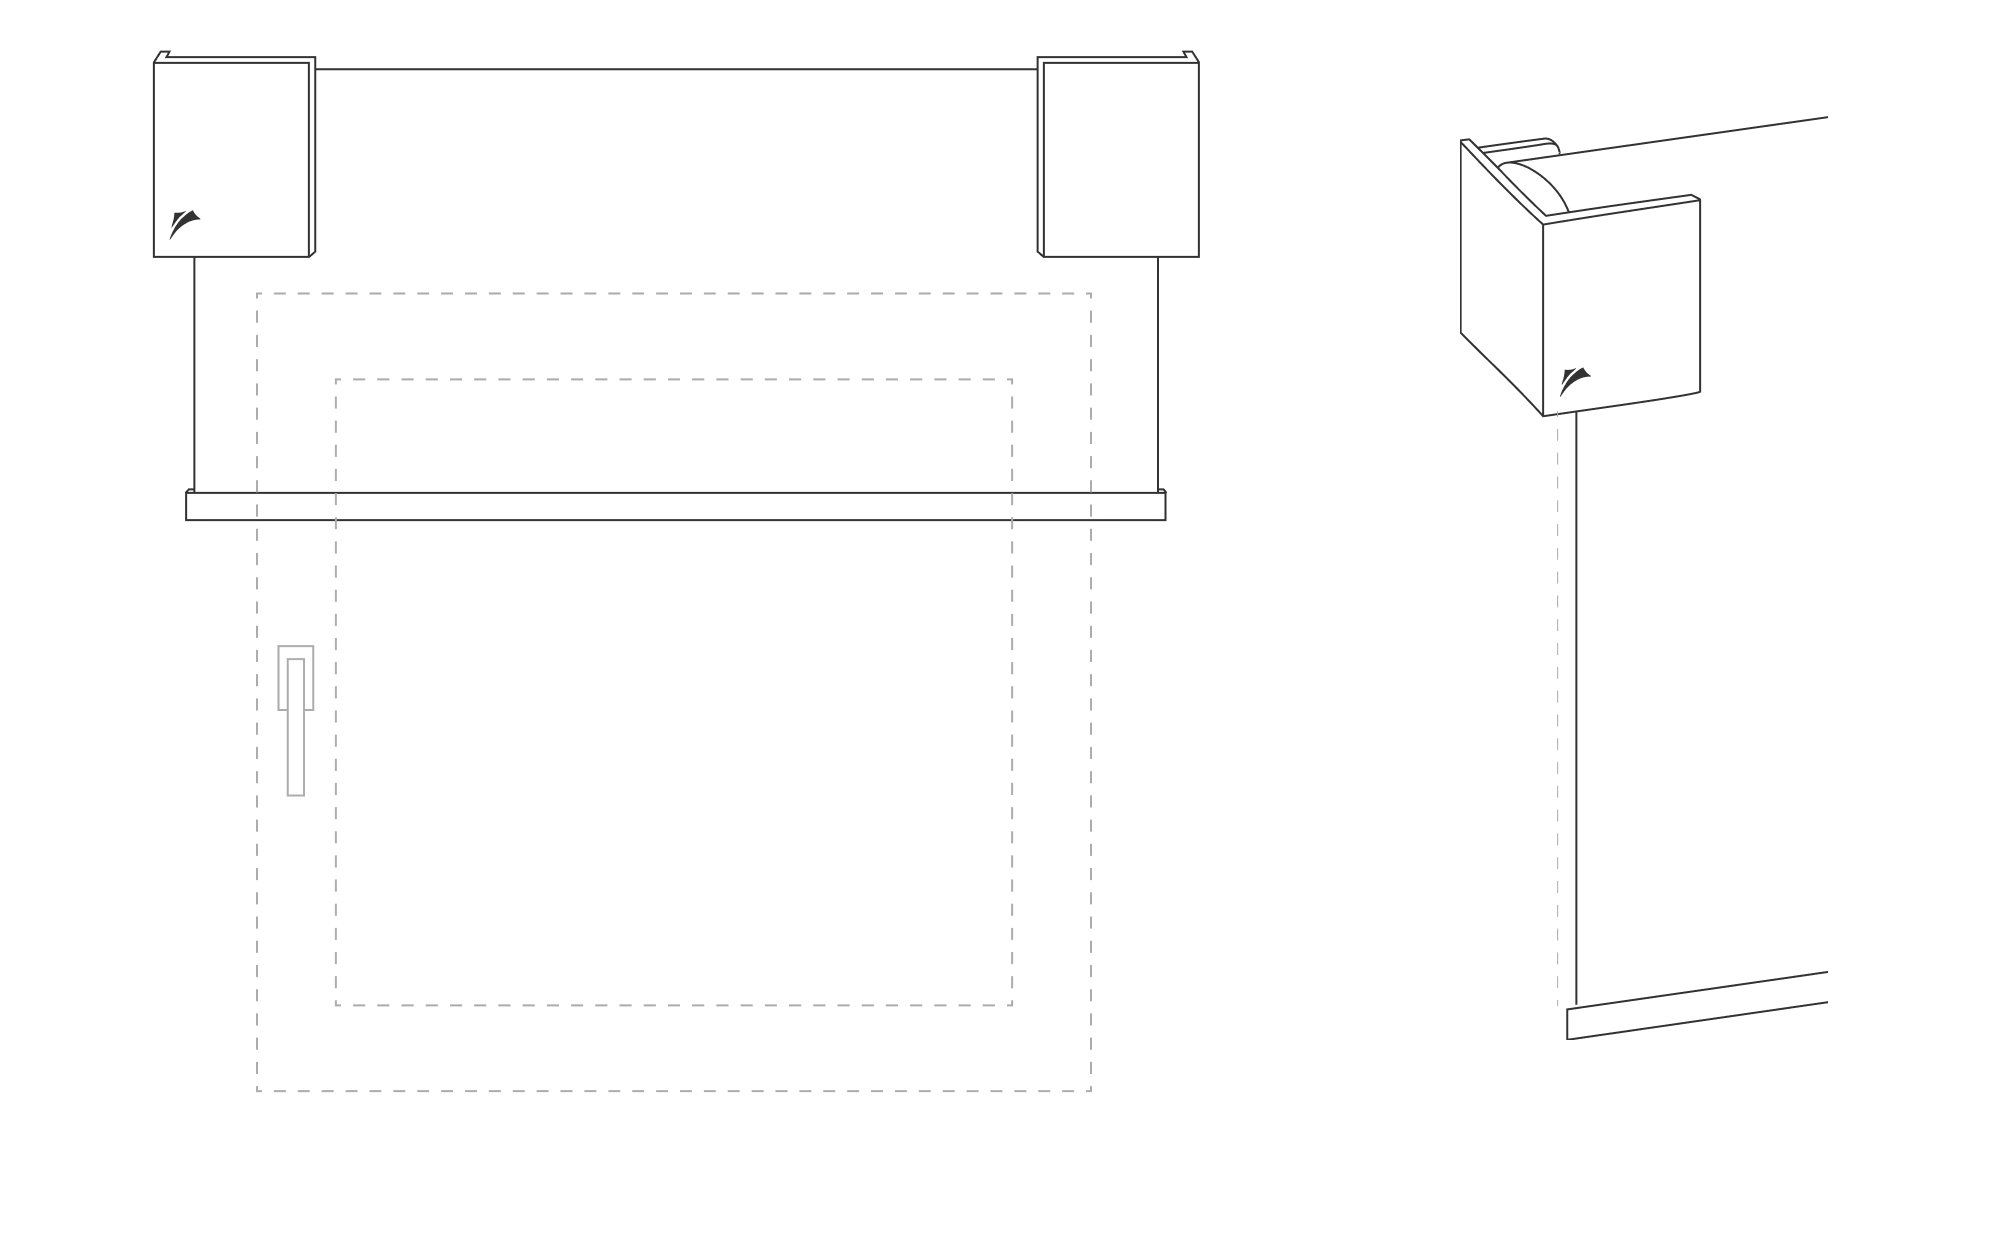
With the shade raised, the side bracket and bottom bar take up 4 1/8" in height: that's the space you need above the window to open it without hitting the shade.

With a wall mount, there's about 3 1/8" between the wall and the fabric: make sure the sash, handle or sill doesn't project farther than that.

SO, WHAT DO YOU NEED TO DO?

Make sure the fabric can lower freely.

  • Check the sill, handles, sash, radiator and anything on the wall near the window.
  • If anything projects more than 3 1/8", consider a ceiling mount.
  • Keep air vents clear.

⚠ WARNING

Check for pipes and electrical wiring before choosing the mounting point.

Hidden pipes or wires may run where you want to fix the side bracket. 

STEP 2

Choose where to mount the side bracket

Before you take any measurements, decide where you'll mount the side bracket: on the wall or on the ceiling. 

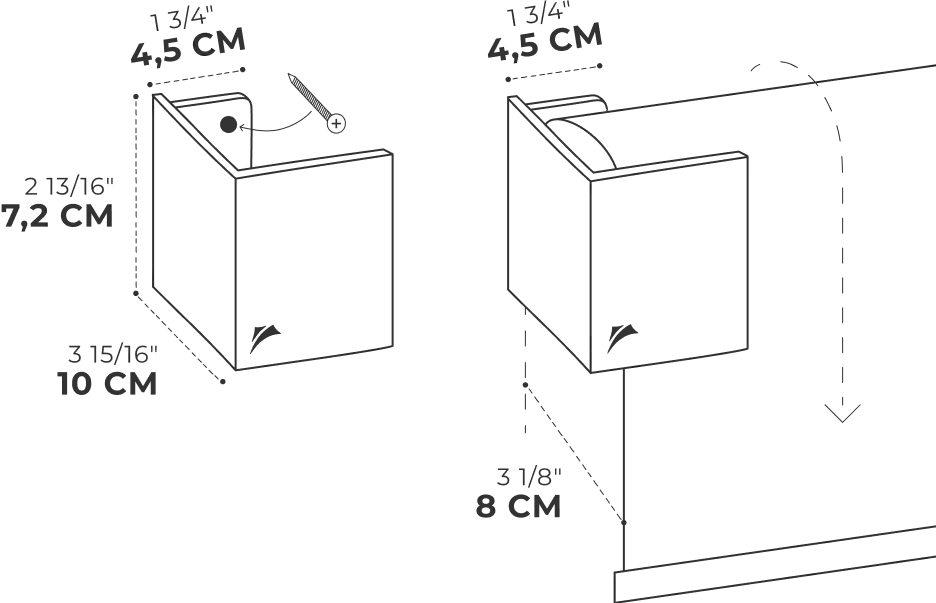
Wall mount

The side bracket is fixed to the wall above the window. With this mount, the fabric hangs about 3 1/8" from the wall.

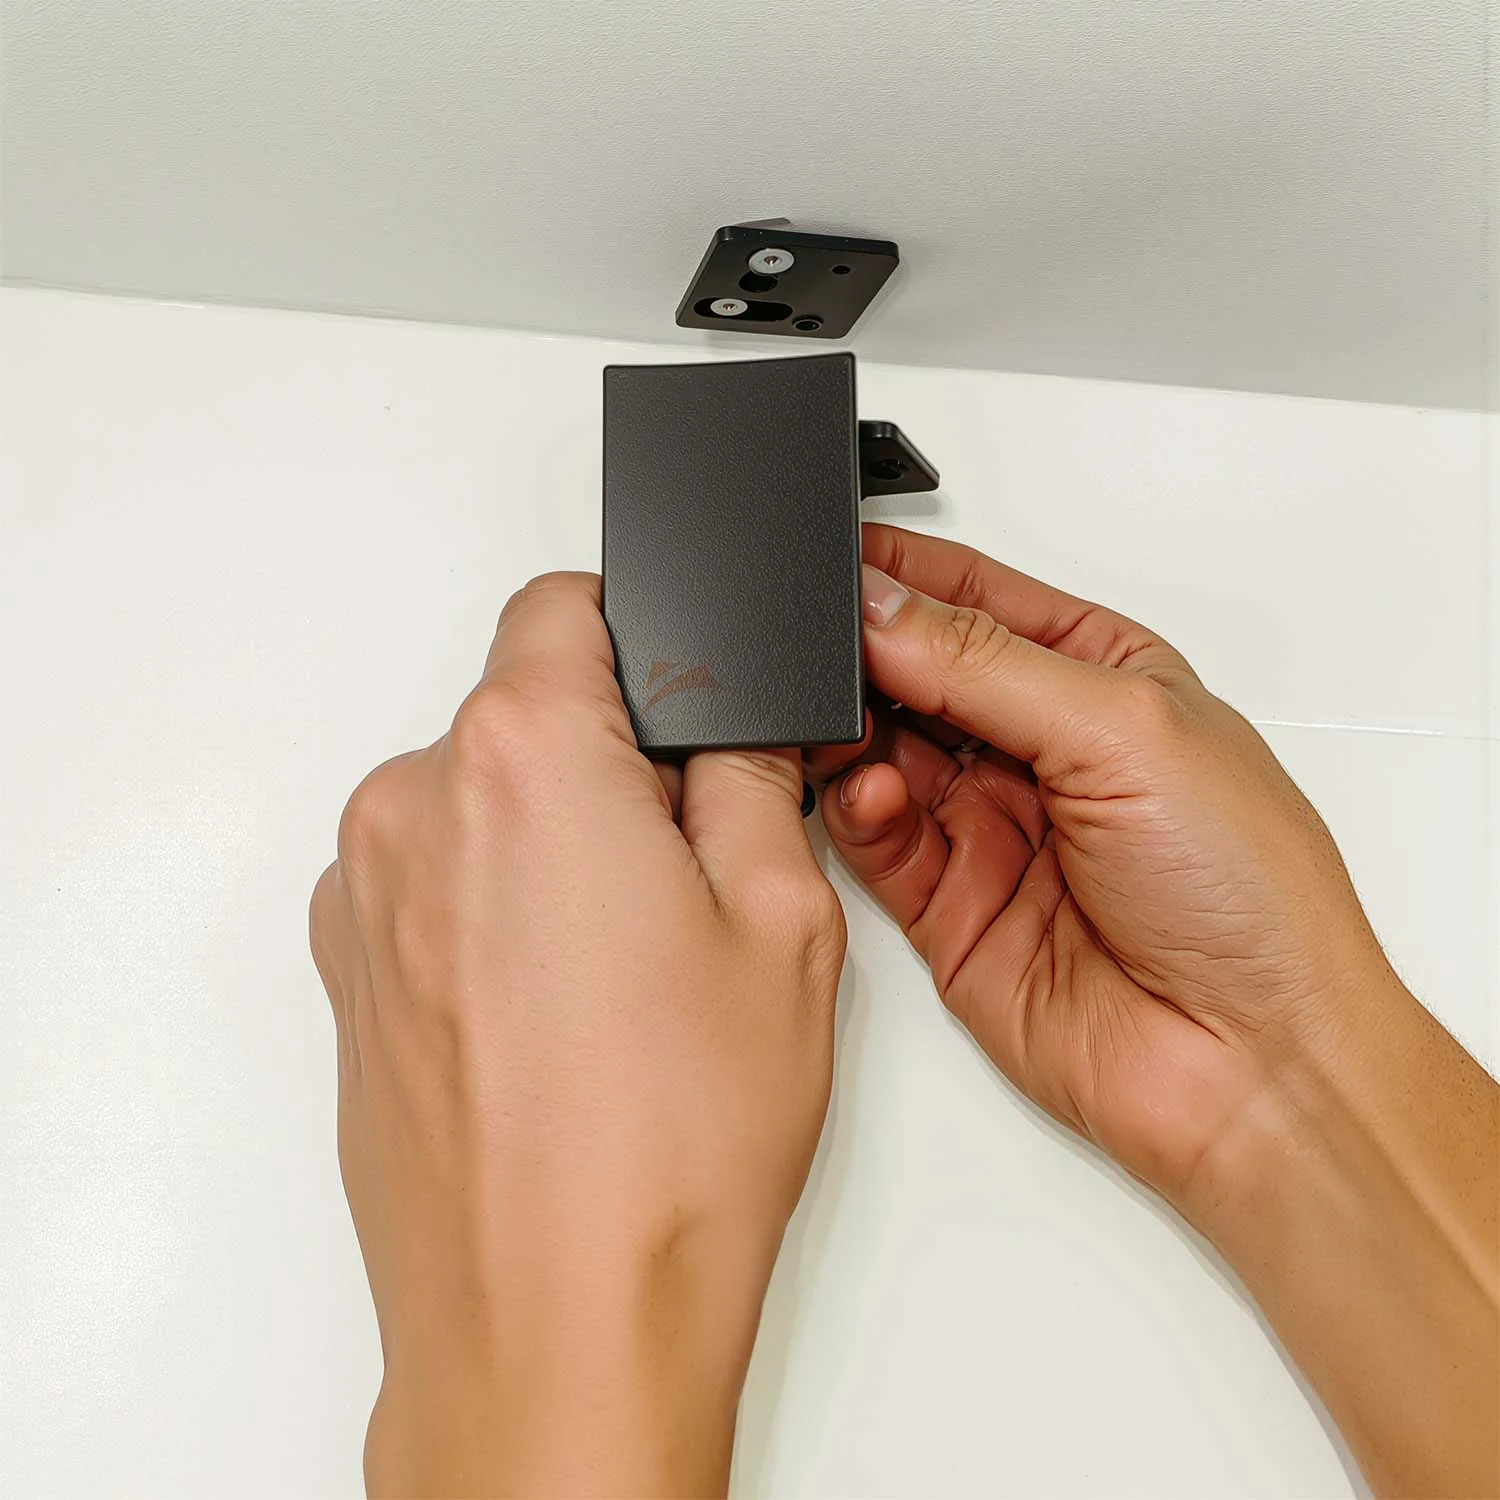
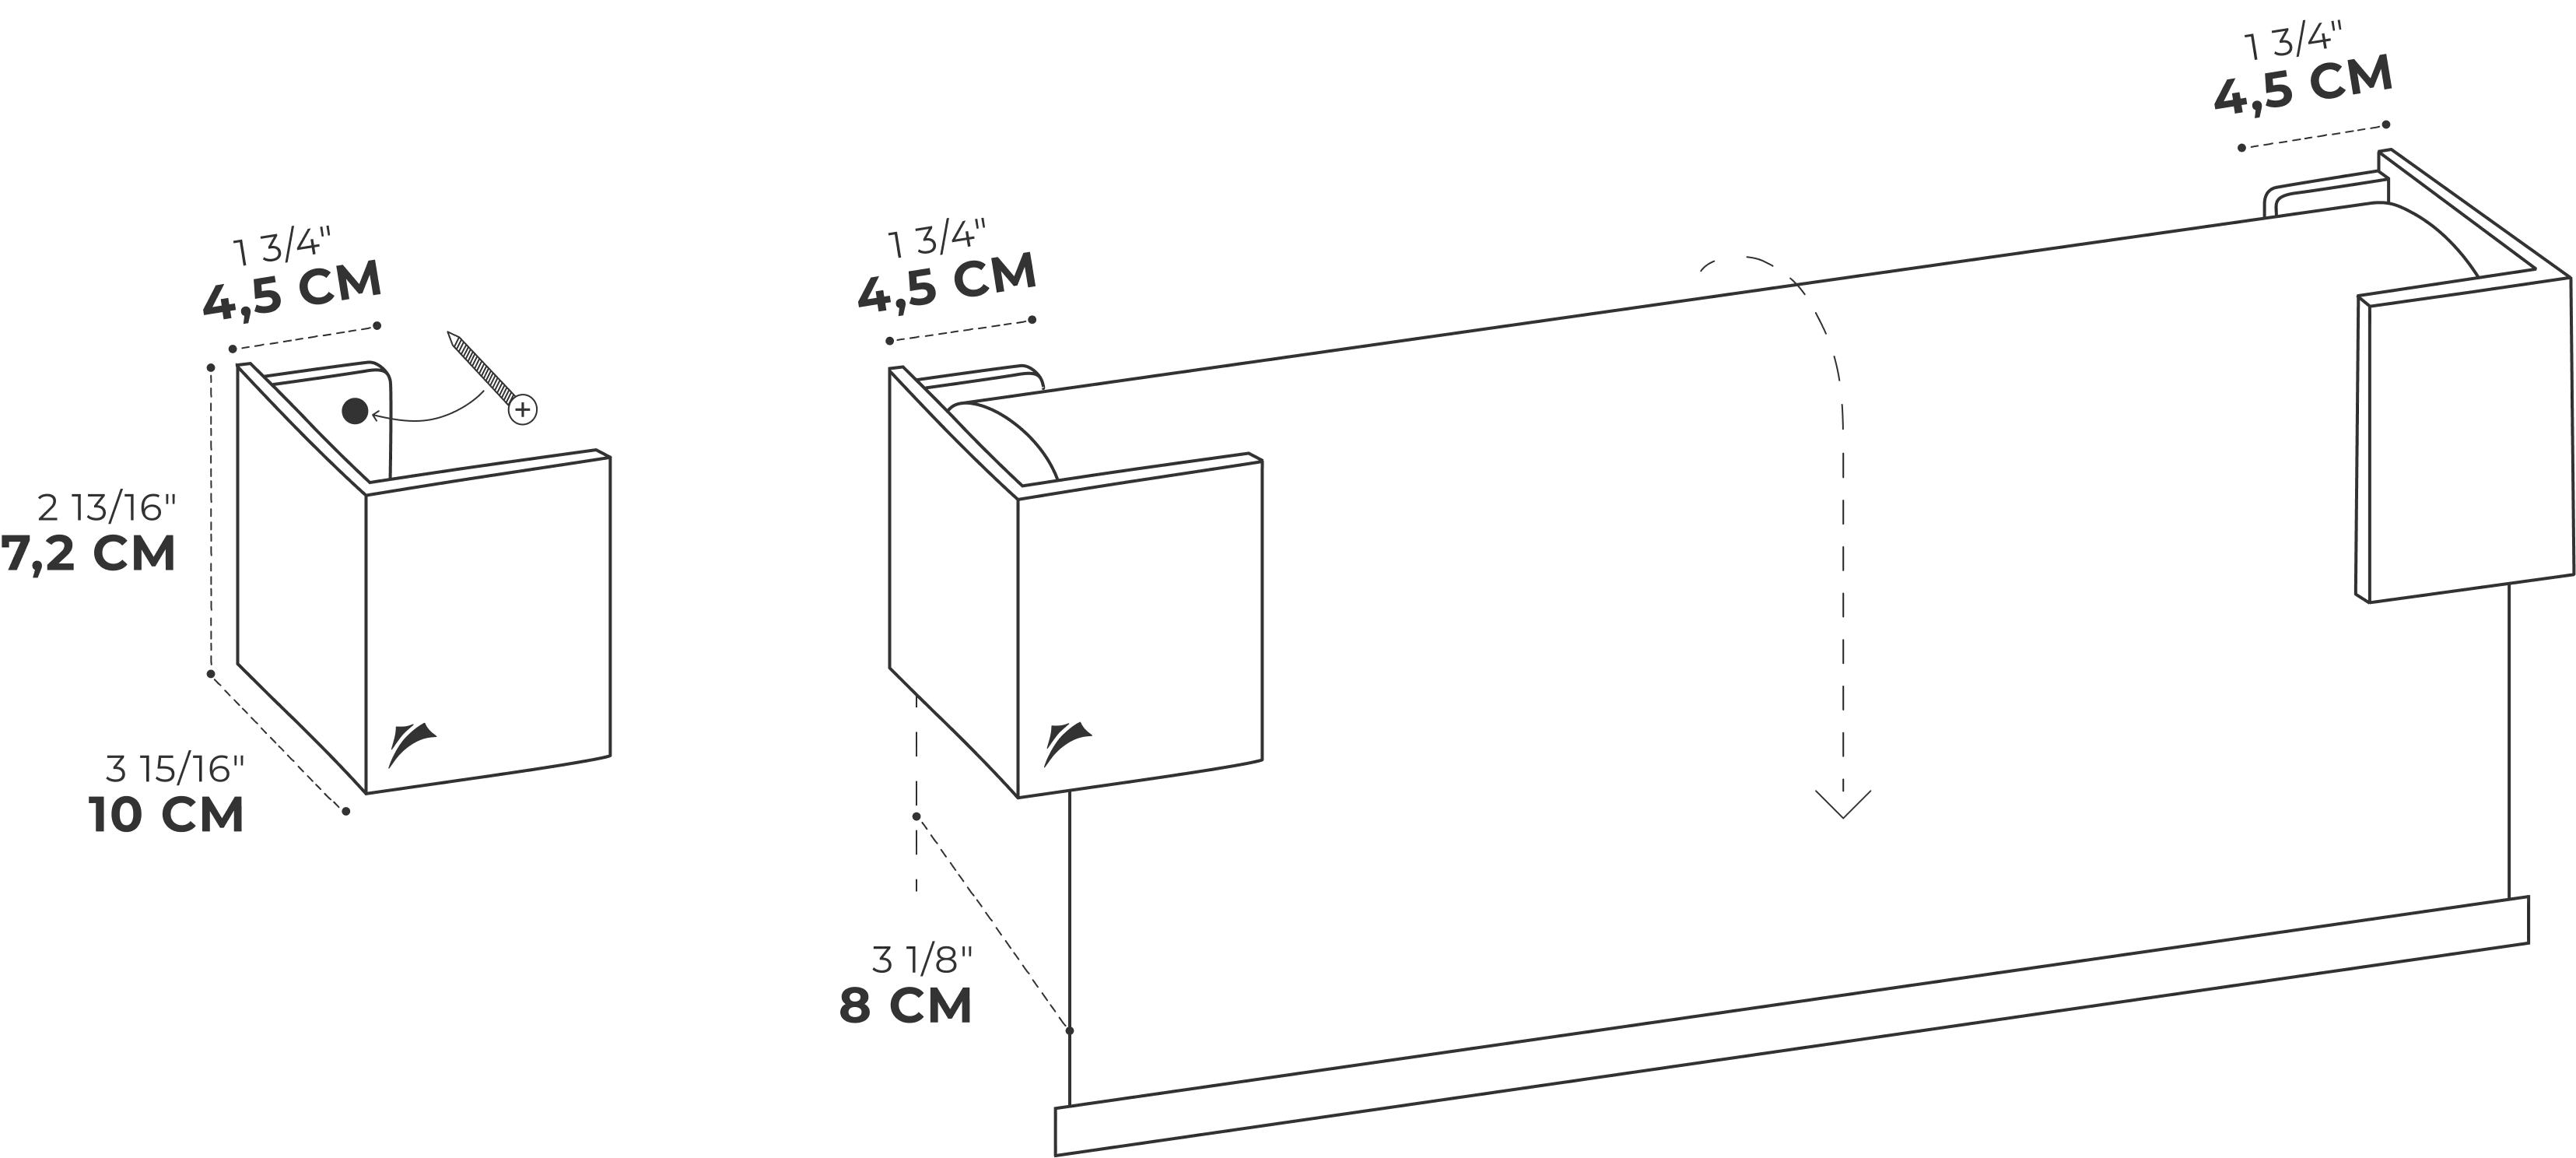
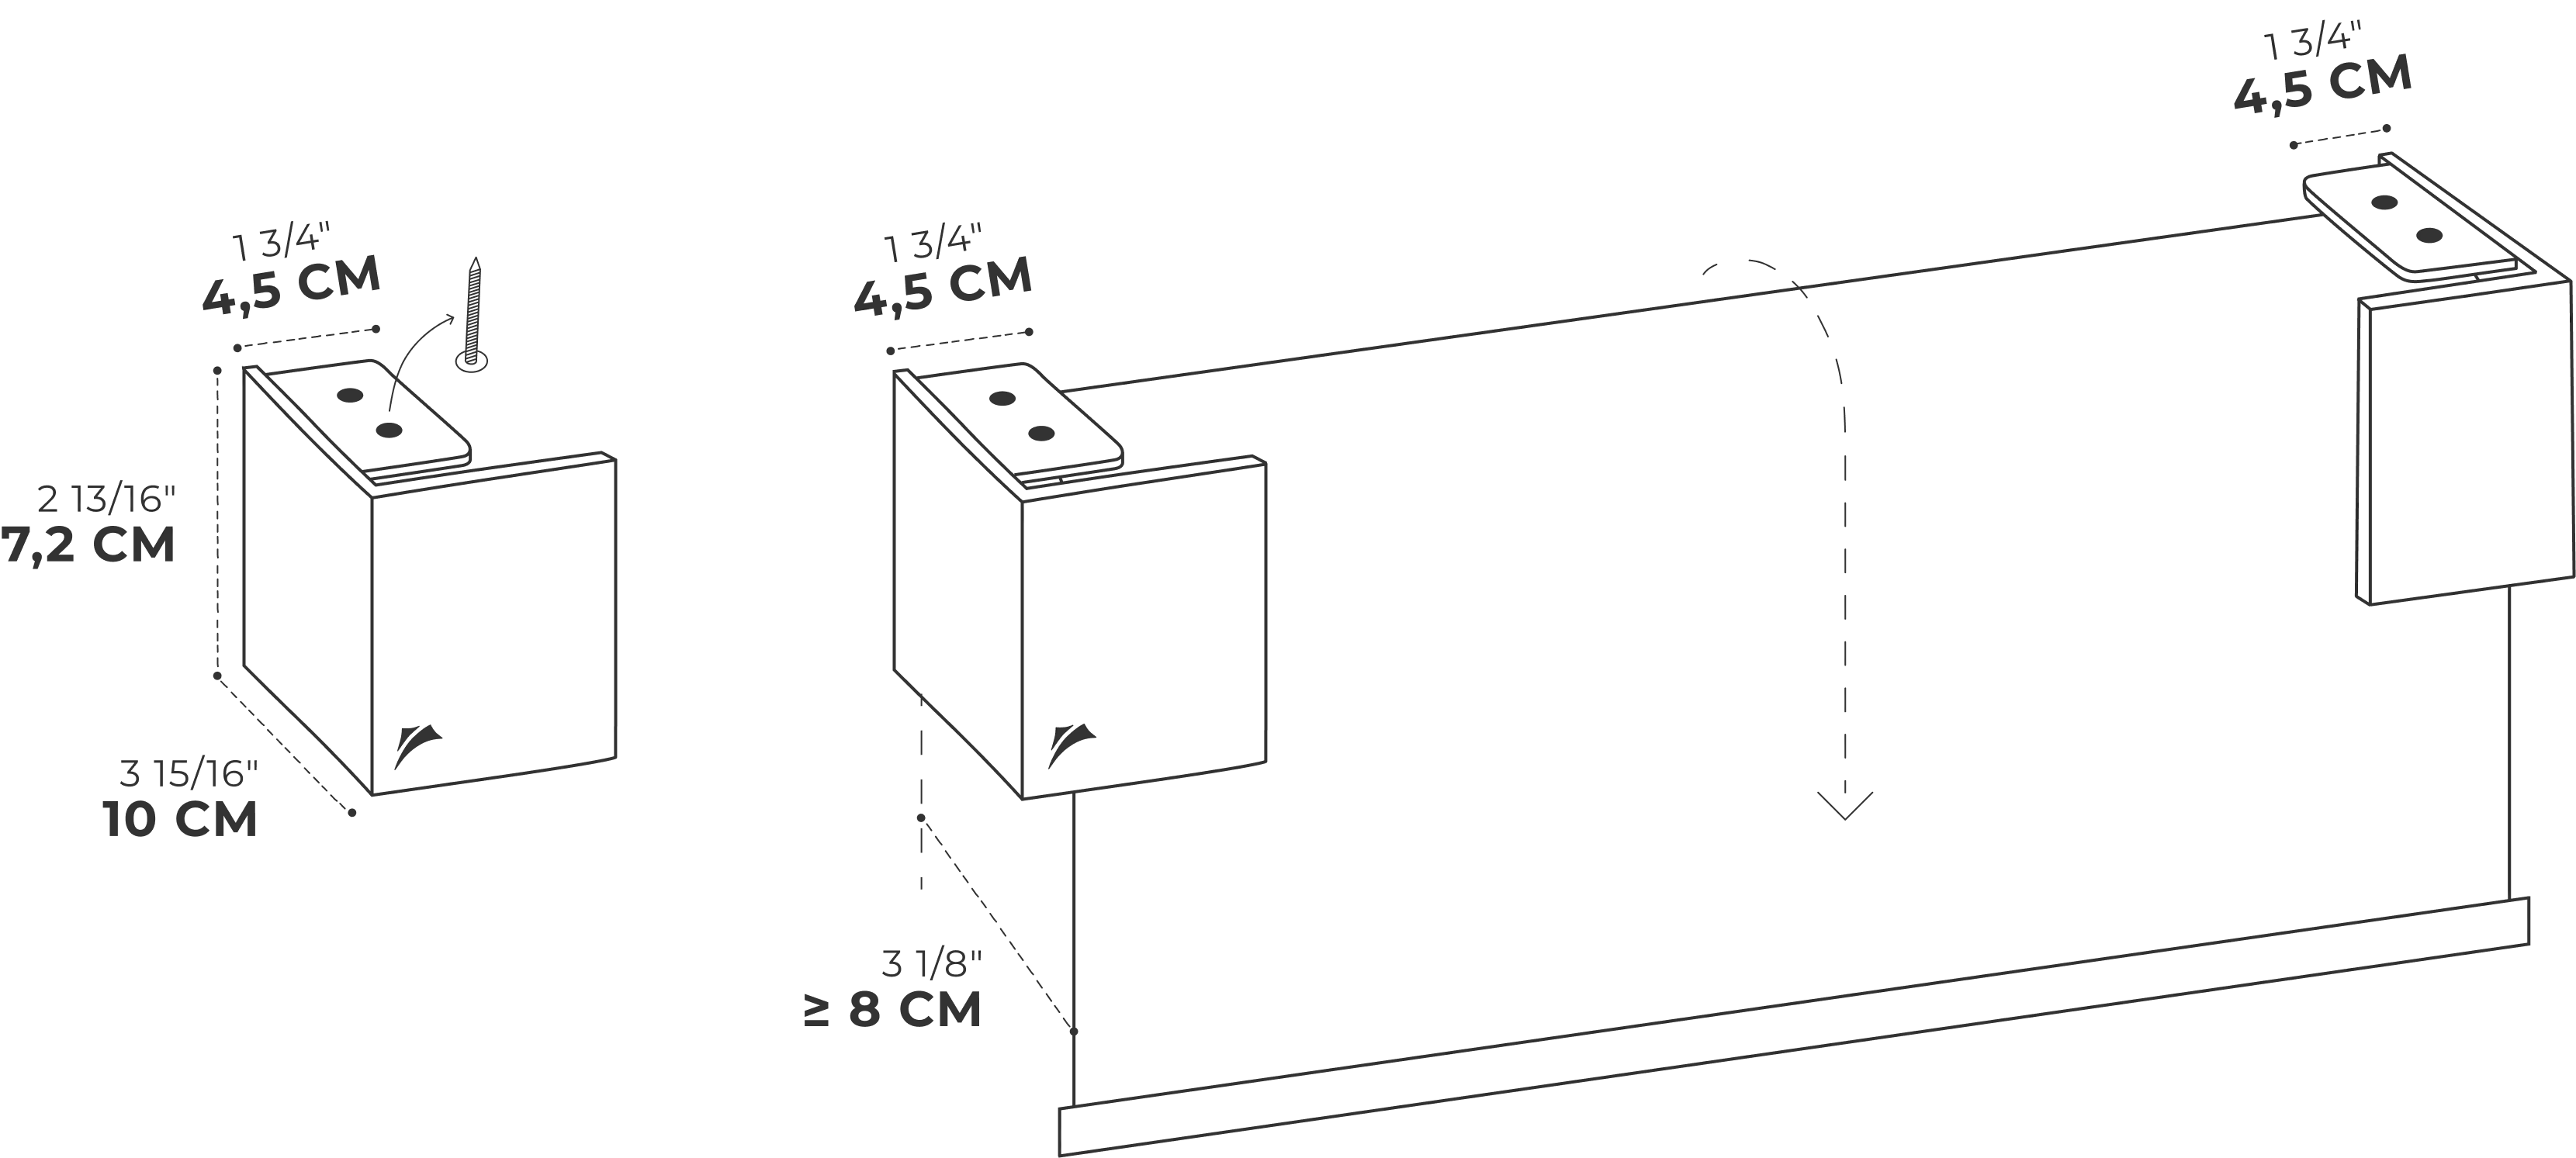
Ceiling mount

The side bracket is fixed directly to the ceiling. It's the right choice when there isn't enough space on the wall, or when the shade needs to hang more than 3 1/8" from the wall.

SO, WHAT DO YOU NEED TO DO?

Decide where to mount the side bracket before you measure.

  • Check how much space there is above the window.
  • Choose whether to mount the shade on the wall or the ceiling, and write it down.

STEP 3

Measure the width

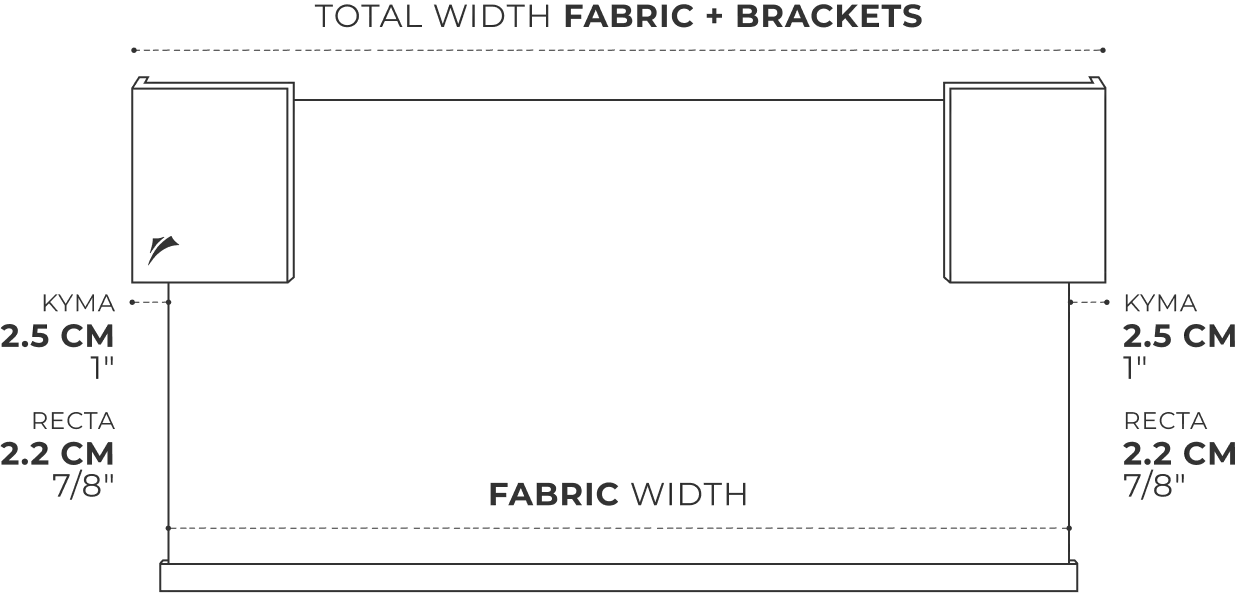
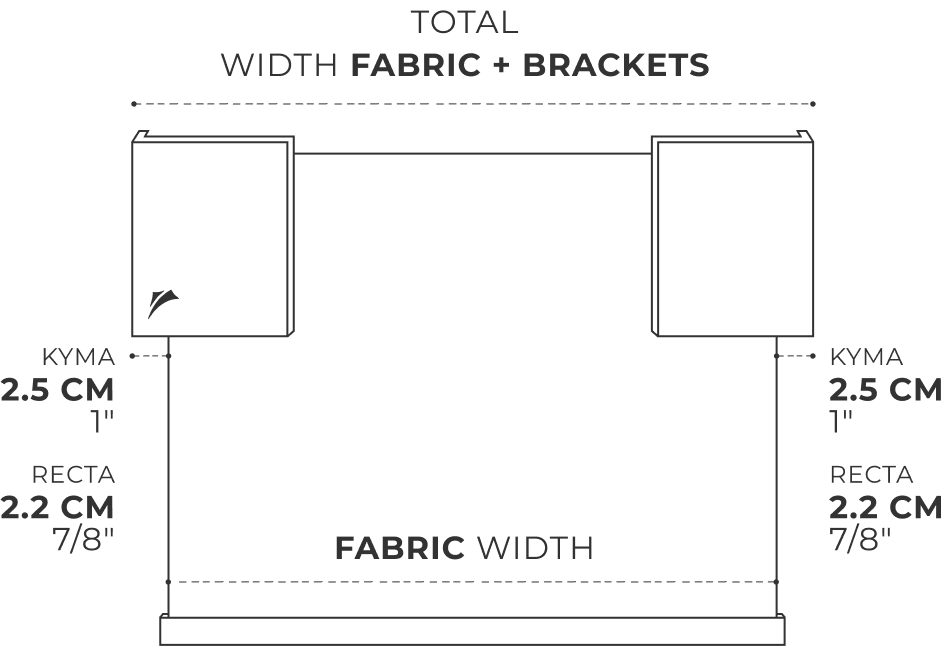
In the configurator you can enter the width in two ways (see the drawing below):

  • Option 1: enter the fabric width
  • Option 2: enter the overall width, side brackets included

Option 1: fabric width

You know how wide you want the fabric to be. We add the width of the side brackets.

So measure the width of the glass, or of the whole frame if you want to cover it.

We recommend adding a 4" overlap

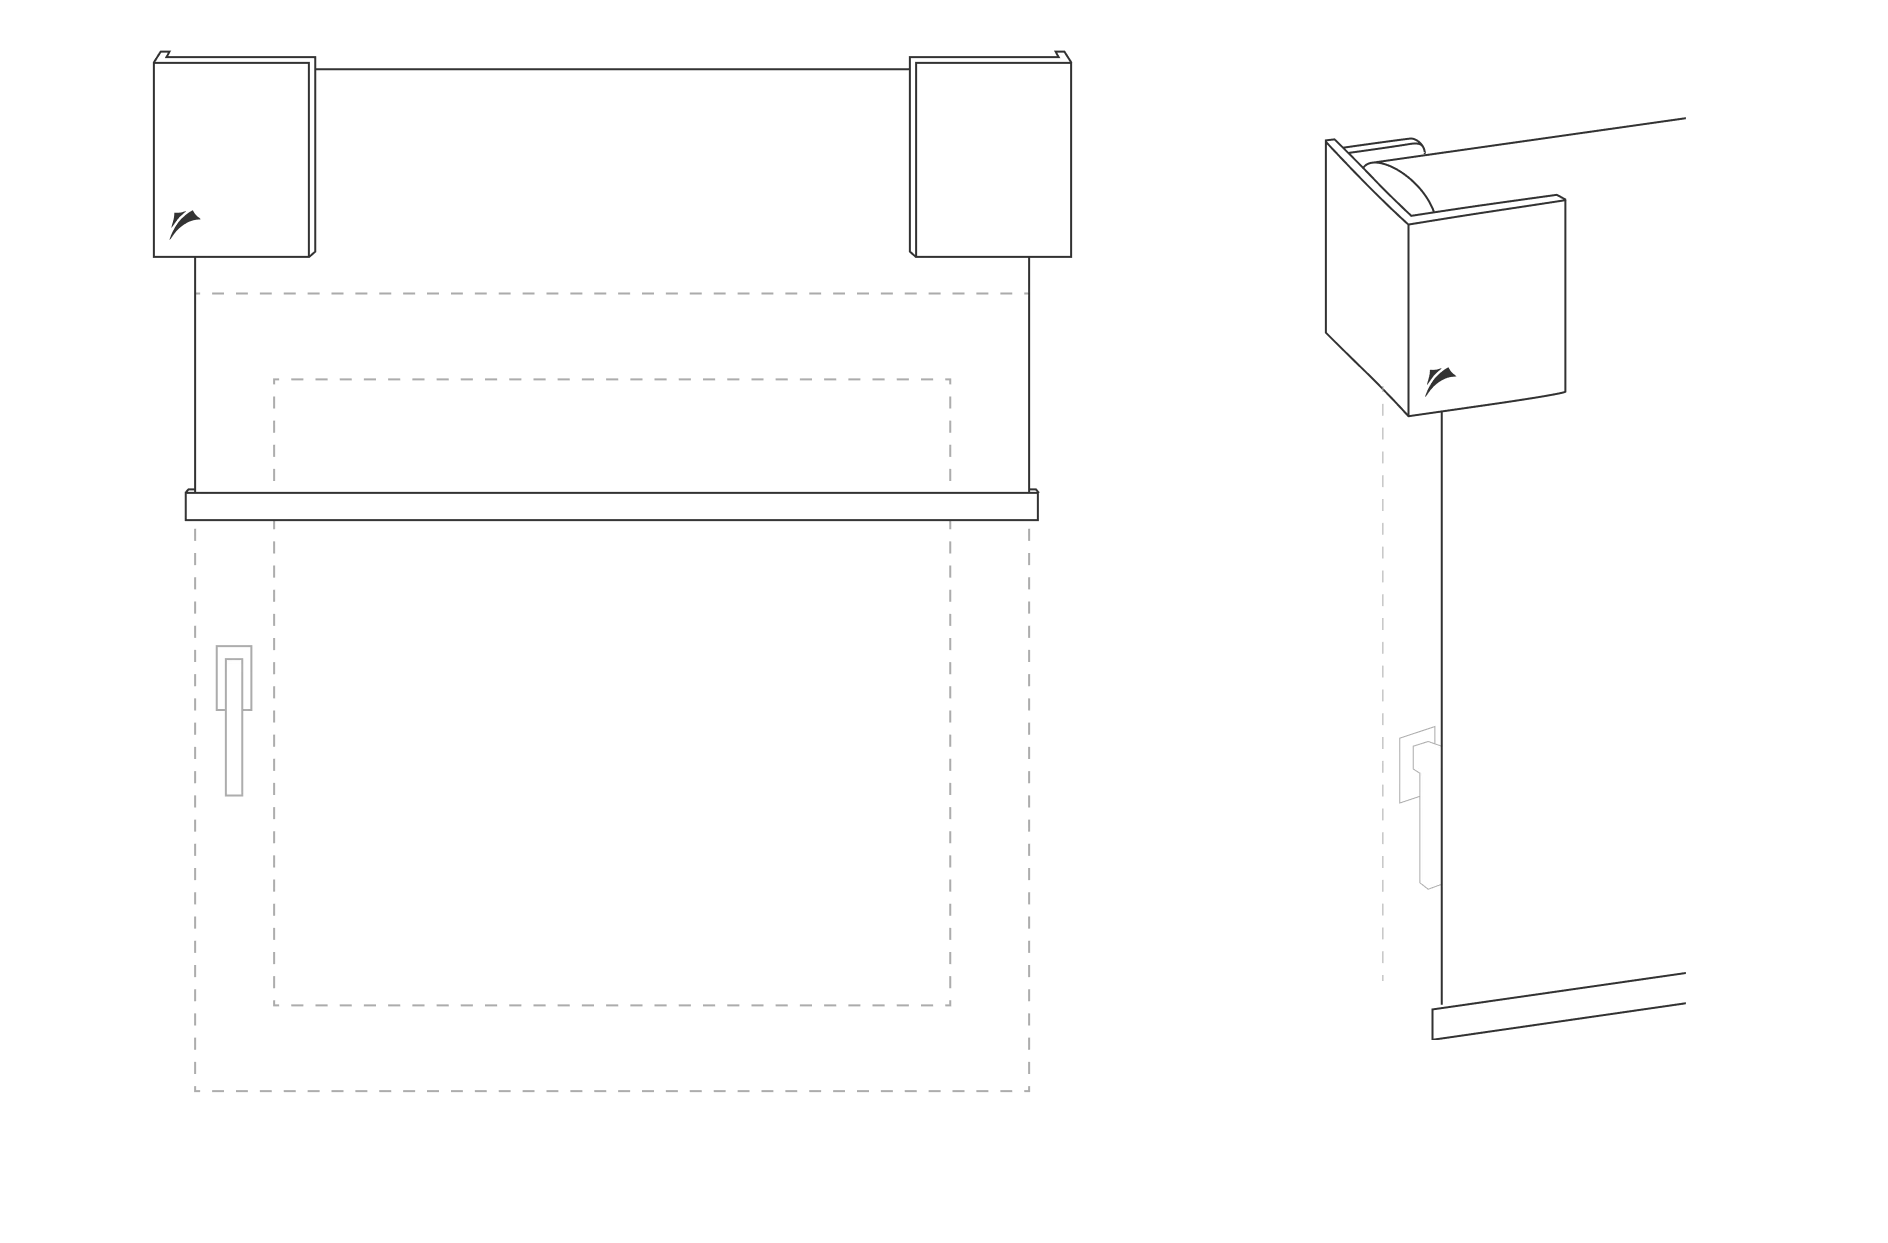
We recommend adding 2" on each side, 4" in total. Without this margin, when you look at the window from the side you'll see part of the glass or frame you wanted to cover, and more light gets in at the sides.

WITHOUT OVERLAP

WITH OVERLAP

Option 2: overall width, side brackets included

Choose this option if the shade has to fit a specific space. Mark on the wall or ceiling where you want the outer edges of the two side brackets to be, then measure from one mark to the other: this is the overall width. We subtract the width of the side brackets, so the fabric will be about 2" narrower than the overall width.

Here are some typical cases where it's better to measure from the side brackets.

Space limited at the sides

The window is in a recess, between two walls or in a corner: the shade, side brackets included, has to fit.

Obstacles next to the window

A cabinet, a shelf, a vertical radiator or a wall just a few inches away limits how far the side brackets can go.

Side-by-side shades

On a wide glass wall, you split the total space between two or more shades, so you work with the overall width of each one.

Lining up with existing elements

The shade has to end flush with a valance box, a beam, a dropped ceiling or another shade in the same room.

Replacing a shade

You're taking down an old shade and want the new one to take up the same space, perhaps using the same holes.

Wall-to-wall shade

You want to cover the wall from one side to the other, not just the window.

SO, WHAT DO YOU NEED TO DO?

If you know how wide you want the fabric to be:

  • Measure the width of the glass or of the whole frame.
  • Add 2" on each side.
  • In the configurator, choose “Fabric width”.

If you know how wide the shade must be, side brackets included:

  • Mark where the outer edges of the side brackets will be.
  • Measure from one mark to the other.
  • In the configurator, choose “Overall width”.

Measure every window separately, even when they look the same. Even a fraction of an inch can make a shade built to another window's size too narrow or too wide.

⚠ WARNING

Remember to choose the right option in the configurator.

STEP 4

Measure the height

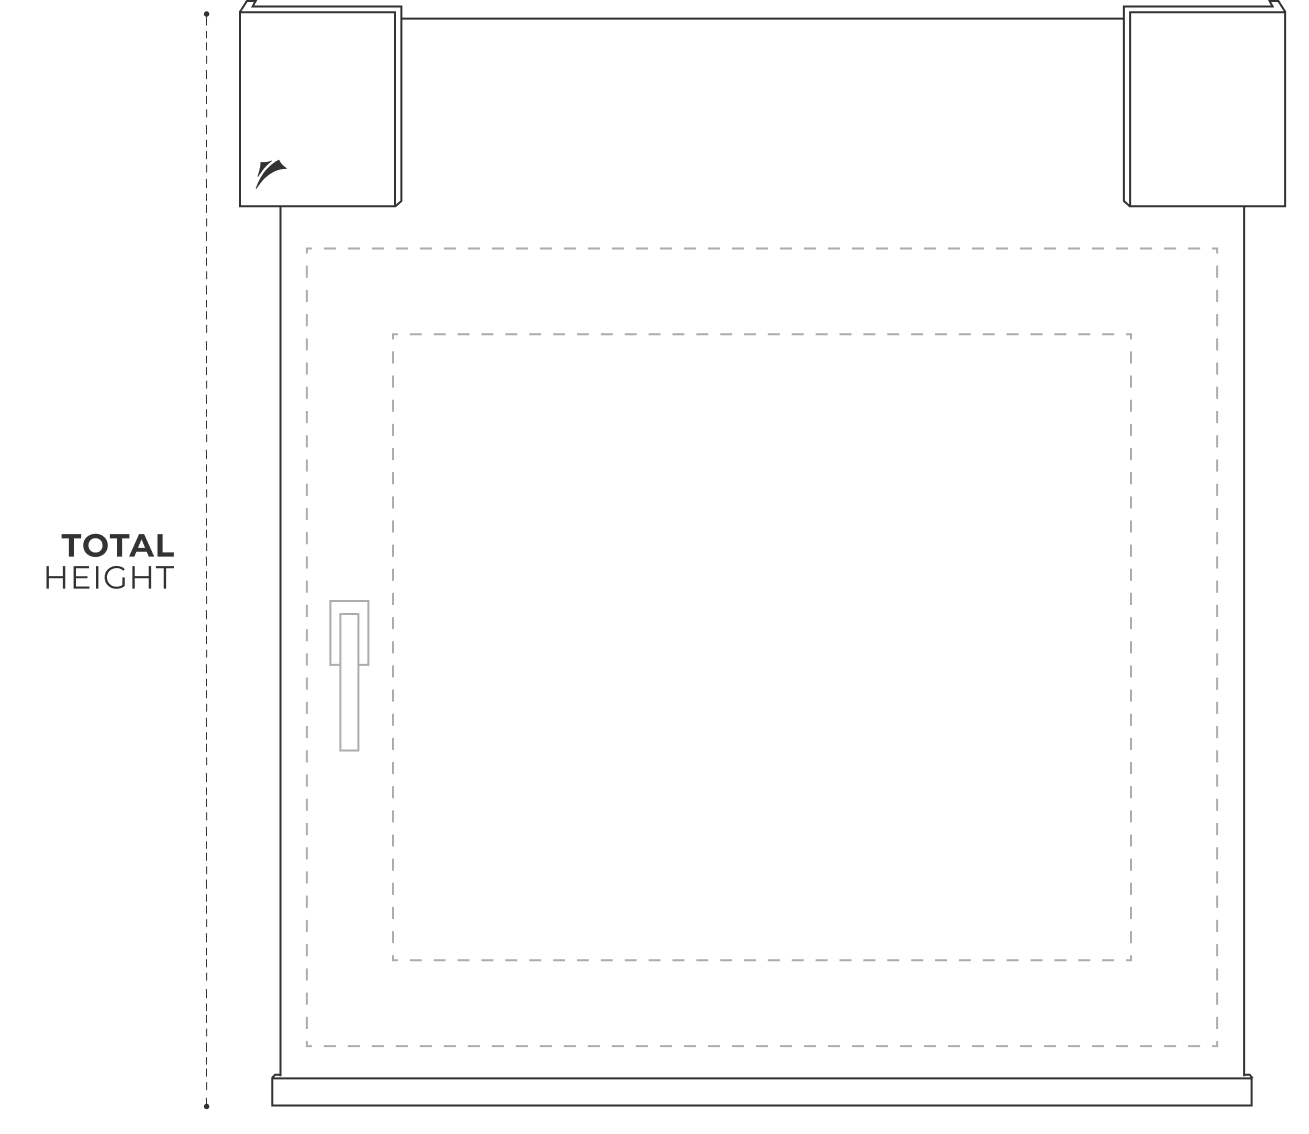
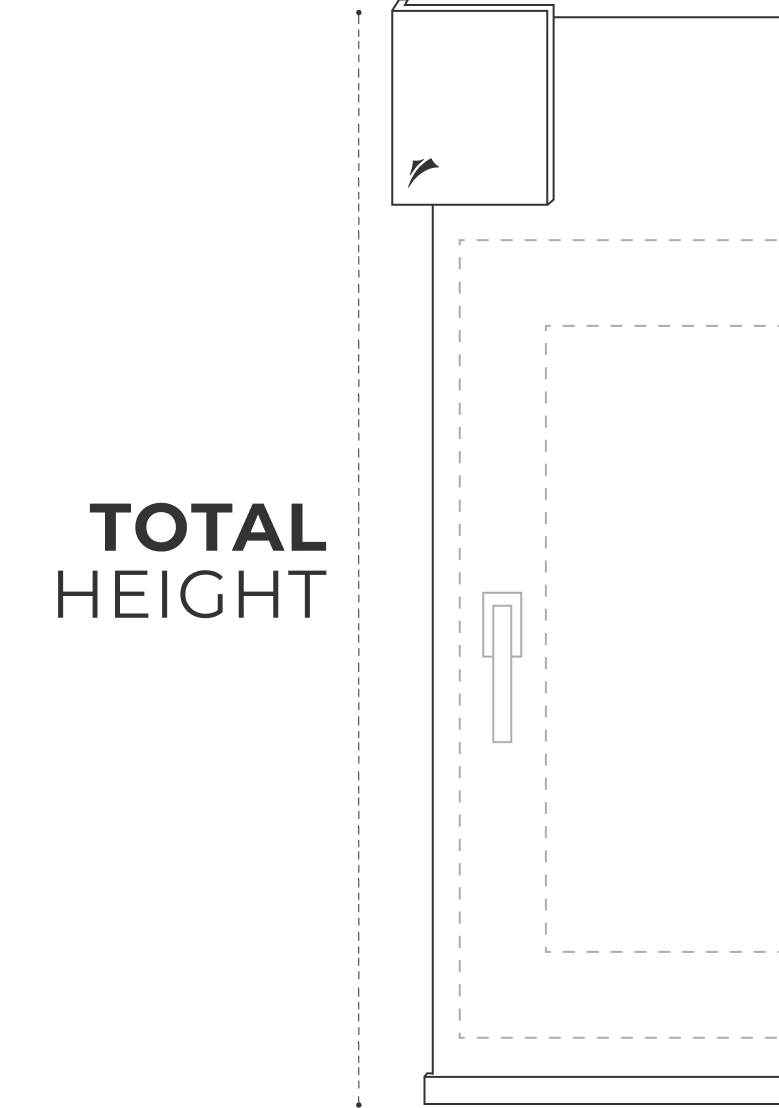
Find the point where you'll mount the side bracket, on the wall or ceiling, and measure from there to where you want the fabric to end: the bottom edge of the sill, or the floor if you want a fuller look.

Mounting point (top) → where you want the shade to end (bottom) = height to enter

You don't need to add or subtract anything: the measurement you take is the one we make. Height ranges from 11 3/4" to 118 1/8", bottom bar included. If the shade goes to the floor, subtract 3/8" so the fabric doesn't drag on the floor.

If you want a manual shade, also measure the height from the floor

Measure from the floor to the point where you'll mount the side bracket. For safety reasons, the chain must end at least 59" off the floor and is at least 19 5/8" long: that's why a manual shade can only be installed at 78 3/4" or higher. Below 78 3/4", you can only choose a motorized shade.

SO, WHAT DO YOU NEED TO DO?

Measure from the mounting point to where you want the fabric to end.

  • Mark the point where you'll mount the side bracket.
  • Measure to the bottom edge of the sill or to the floor.
  • Check that the measurement is between 11 3/4" and 118 1/8".

STEP 5

Got your measurements? Design your shade

At this point you have everything you need:

  • width: fabric width (glass or frame + overlap) or overall width (from one mounting point to the other), with the matching option;
  • height: from the mounting point to where you want the fabric to end;
  • mounting height from the floor: only if you choose a manual shade.

Open the configurator, enter your measurements and choose the fabric. If you're unsure about the fabric, read the guide before you configure: you can order physical fabric samples. For any questions about measurements, we offer a free video consultation.

Don't order if you're unsure of a measurement.

The shade is made to measure: write to us first, and our team will check the measurements with you before it goes into production.

SPECIAL CASES

French doors and sliding doors

French doors and sliding doors

Measure them as you would a window, keeping the same constraints in mind. The shade usually goes to the floor: measure from the mounting point to the floor and subtract at least 3/8", so the fabric stays just off the floor and doesn't drag. 

Several side-by-side shades make the French door easier to open

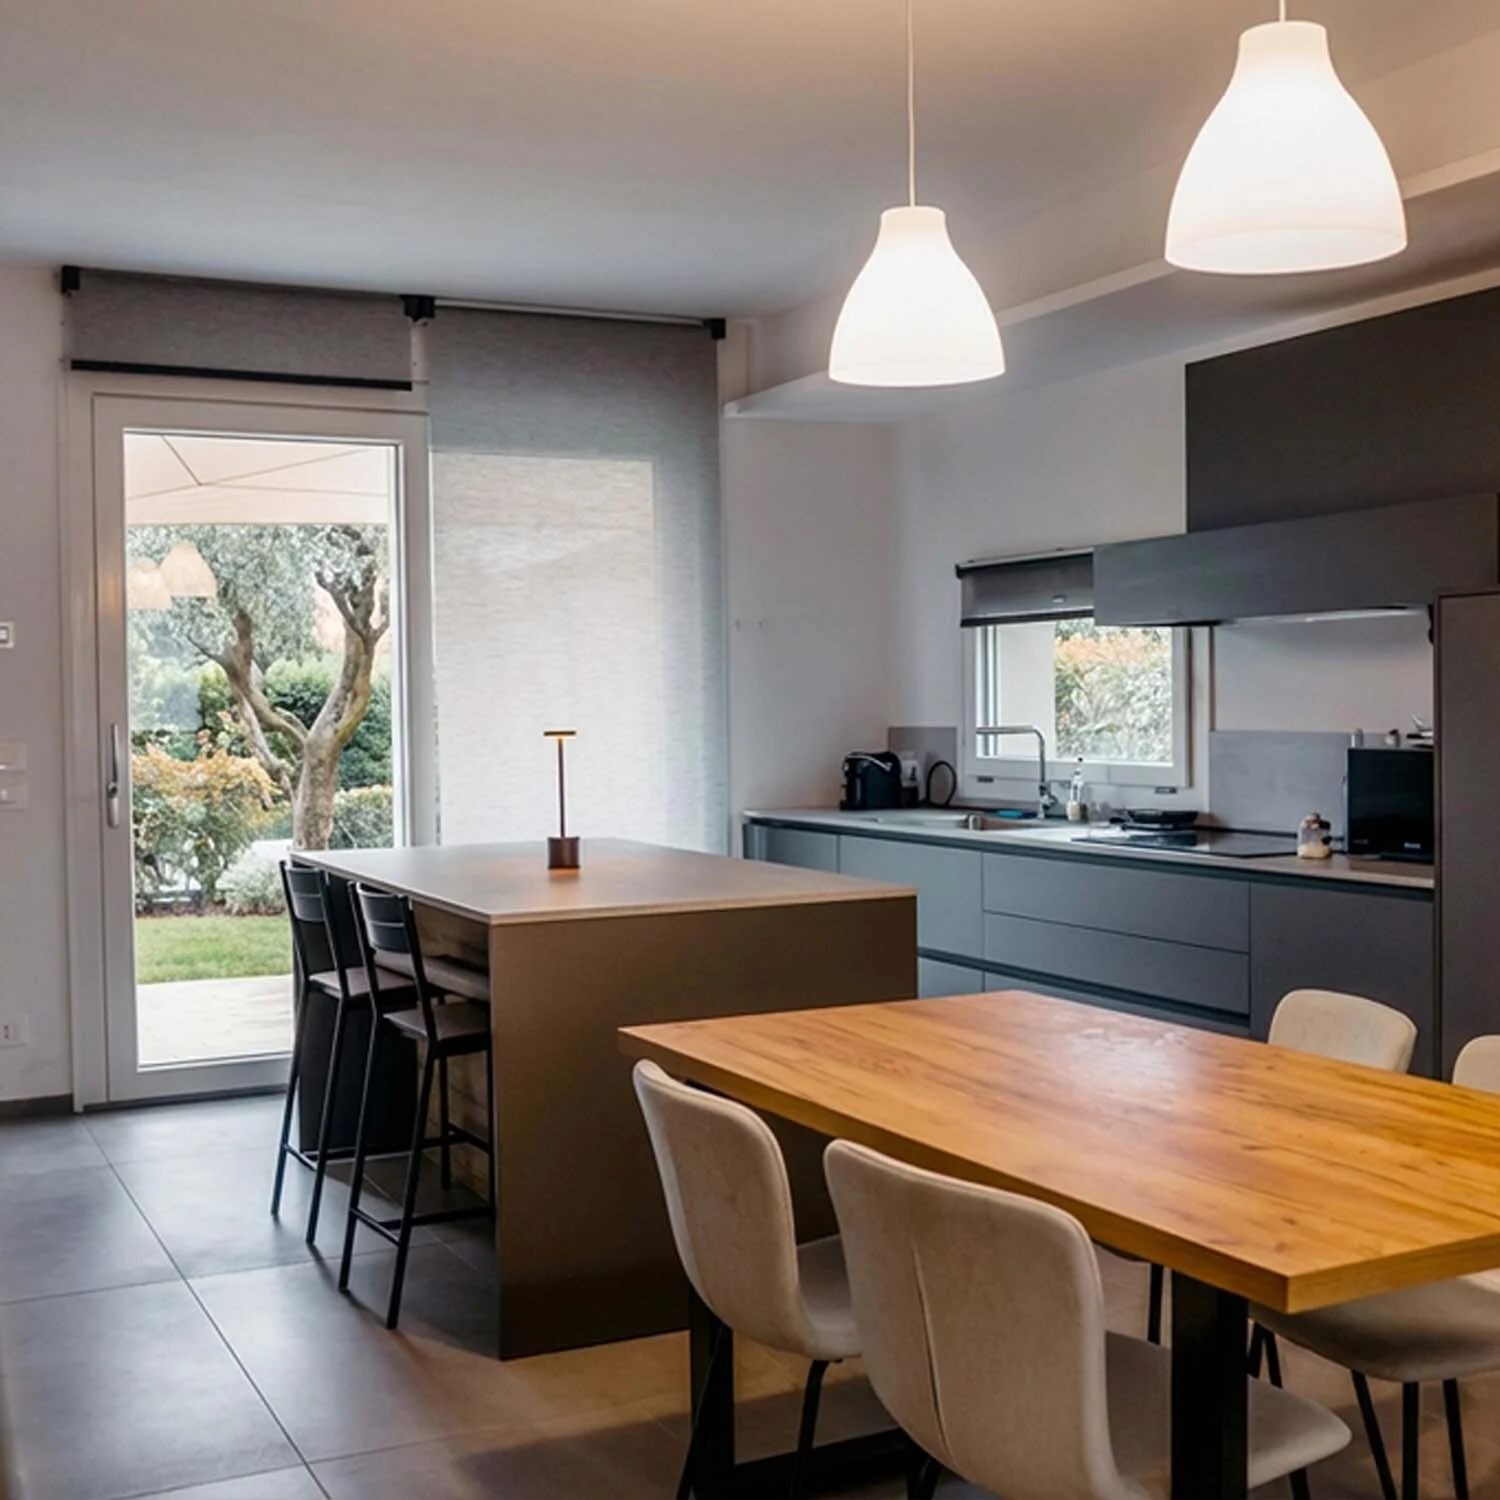
For doors with several panels, we recommend one shade per panel: you can raise only the one you walk through and leave the others down.

Several side-by-side shades

The maximum overall width, side brackets included, is 110 1/4". For a wider glass wall, you'll need two or more side-by-side shades.

How do you measure in this case?

  1. Measure the total width to cover, from one mounting point to the other.
  2. Decide how much space to leave between one side bracket and the next, and subtract it from the total width if needed. You can also mount them right next to each other.
  3. Divide the result by the number of shades. Each shade must be between 23 5/8" and 110 1/4" wide.
  4. In the configurator, choose the “Overall width” option and enter the measurement for each shade.

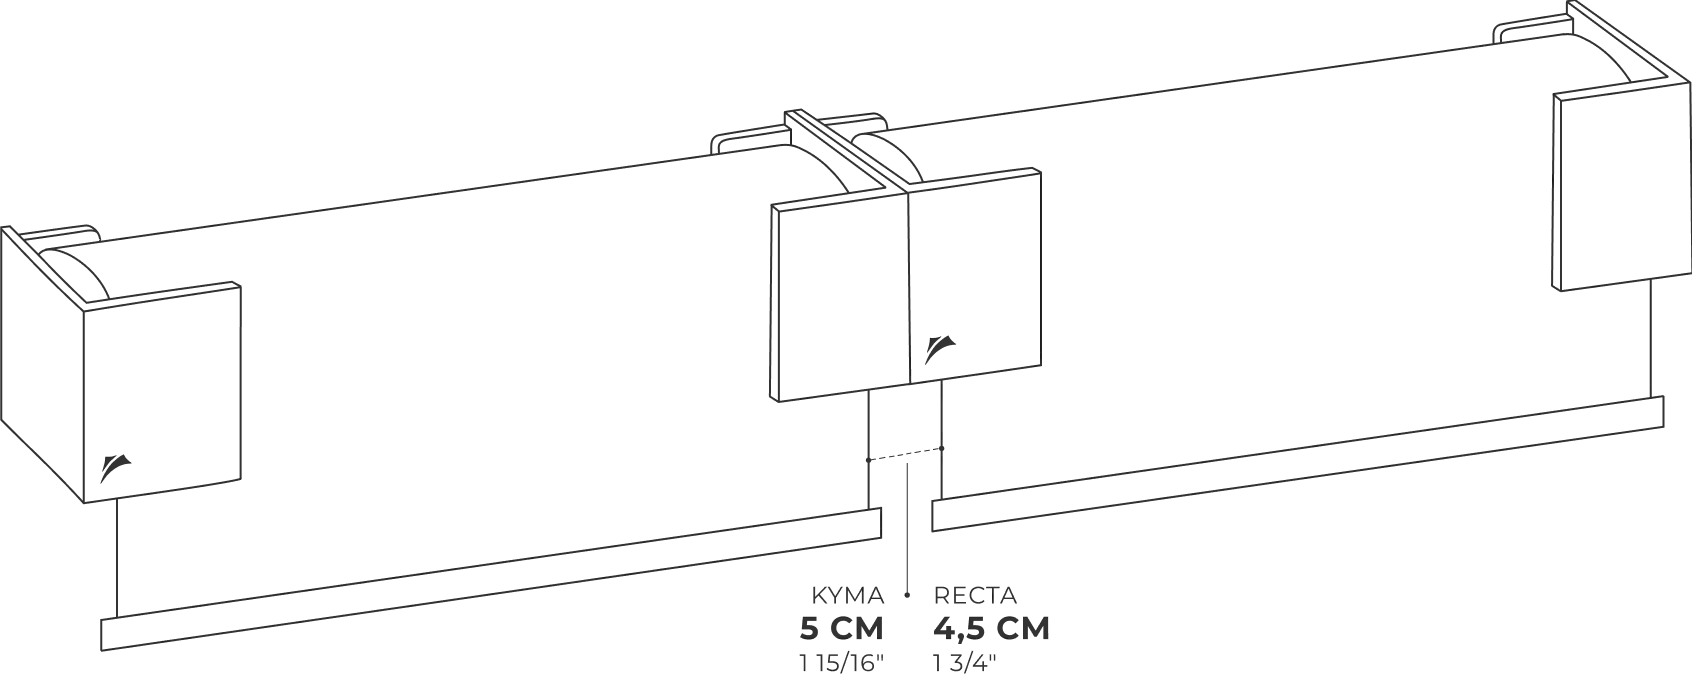
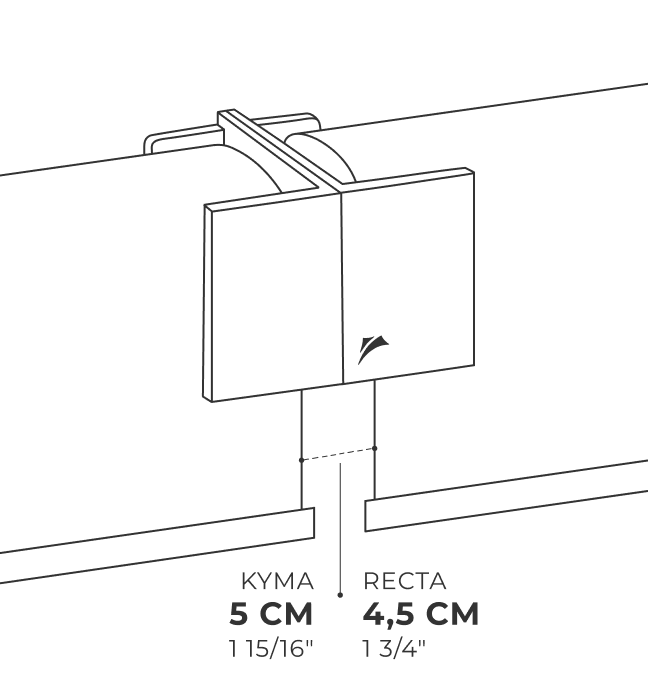
For side-by-side shades with brackets touching

Keep in mind there will be a gap of about 2" between the two fabrics.

Tips from the Centro Stile Maanta

Mount all the side brackets at the same height and on the same plane, and give every shade the same height: that way the glass wall has a continuous line, top and bottom.

If the glass wall has a mullion, place the split there: the gap sits in front of the mullion and doesn't let light through. If the mullion isn't centered on the glass wall, the shades will have different widths: measure each one from its mounting point to the center of the mullion.

FAQ

TOPIC (ADD ONE FOR EACH SECTION OF THE GUIDE)

Accordion #1
I am item content. Click edit button to change this text. Lorem ipsum dolor sit amet, consectetur adipiscing elit. Ut elit tellus, luctus nec ullamcorper mattis, pulvinar dapibus leo.
Accordion #2
I am item content. Click edit button to change this text. Lorem ipsum dolor sit amet, consectetur adipiscing elit. Ut elit tellus, luctus nec ullamcorper mattis, pulvinar dapibus leo.

FAQ

FAQ

We make every shade to measure, with an overall width from 23 5/8" to 9' 2", plates included, and a height from 11 7/8" to 9' 10", bottom bar included.

No. Our indoor roller shades attach to the wall above the window or to the ceiling.

Enter the fabric width if you know how wide you want it: measure the glass or frame and add 2" on each side. Enter the overall width if the shade has to fit a specific space, for example a niche, between two walls or next to a piece of furniture.

That way the fabric also covers the edges of the window, less light comes in at the sides, and when you look at the window from an angle, you don't see the glass or frame: it's an aesthetic recommendation from Centro Stile Maanta, our in-house style office in Italy.

No. We make the exact height you give us: if you add extra, the fabric will hang lower than you wanted. Only if the shade reaches the floor, subtract 3/8" so the fabric doesn't drag on the floor.

With the shade raised, the plate and bottom bar take up 4 1/8" of height. That's the space you need above the window to open it without hitting the shade, whether you mount it on the wall or the ceiling.

With wall mounting, about 3 1/8". If the sill, handle or radiator sticks out further, choose ceiling mounting.

Yes, if you mount the plate at least 6' 6 3/4" off the floor. For safety reasons, the chain must end at least 4' 11" above the floor. Below 6' 6 3/4", you can only choose the motorized shade.

Yes, a manual shade can be motorized even after purchase.

No, measure each window separately. Even a small fraction of an inch can make a shade too narrow or too wide.

Use two or more shades side by side. Measure the overall width, decide how much space to leave between the plates and divide the measurement by the number of shades. You'll find all the steps in the “Special cases” section.

Yes, even with the plates butted together, there's about 2" with Kyma and about 1 3/4" with Recta. If the glass wall has a mullion, put the split there: the gap ends up in front of the mullion.

Write to us before you order: our team will check the measurements with you before your shade goes into production.